


Building your own firearm from scratch offers unmatched customization and a deeper understanding of the platform, and an 80% lower receiver kit is the essential starting point. These kits provide the unfinished receiver block, jig, and necessary tooling, allowing you to legally complete the component without a serial number for personal use. By machining the fire control cavity yourself, you gain full control over the build process while bypassing standard transfer requirements.
Unlocking the Build-Your-Own Firearm Experience

Unlocking the build-your-own firearm experience transforms a mere purchase into a personalized journey of craftsmanship. By selecting individual components—from a precision-machined lower receiver to a custom trigger assembly—you gain unparalleled control over performance and ergonomics. This process empowers you to engineer a weapon that fits your exact specifications, whether for competitive shooting, hunting, or home defense. The satisfaction of assembling a functional firearm from disparate parts is unmatched by any store-bought model. Beyond the hands-on reward, building your own weapon provides deep insight into mechanical operation, making troubleshooting and maintenance intuitive. For those seeking a unique tool and a deeper connection to their equipment, this is the definitive path to a truly customized firearm.
Why Hobbyists Choose an Unfinished Lower for Custom Projects
Unlocking the build-your-own firearm experience puts total customization and craftsmanship directly in your hands. This process, often centered on 80% lowers and receiver kits, allows you to assemble a legally compliant firearm without serialized registration, provided you follow all federal and state laws. The complete DIY gun building process demands precision, patience, and a solid understanding of machining or 3D printing techniques. Key components you must master include:
- Selecting a jig and router for aluminum lowers, or choosing a reliable 3D printer for polymer frames.
- Sourcing high-quality trigger groups, barrels, and bolt carrier assemblies.
- Understanding the legal distinction between a firearm and a non-firearm frame.
This is not a hobby for the careless—it is a serious undertaking for the dedicated enthusiast. From finishing the fire control pocket to assembling the upper receiver, every step reinforces your skill and self-reliance. Ultimately, you build more than a firearm; you build your own independence and mastery over the tools that protect your freedoms.
The Legal Landscape of Self-Manufactured Frames
The build-your-own firearm experience offers enthusiasts a direct path to customize performance, aesthetics, and fit through component assembly. Custom firearm assembly kits typically include a receiver frame, barrel, slide, and trigger group, allowing users to select aftermarket parts for ergonomic or functional upgrades. This process often requires basic mechanical skills and tooling, such as pin punches and sight pushers, to ensure reliable function.
- Key benefits: personalization of grip angle, sight type, and trigger pull weight.
- Common challenges: fitting tolerances for slide-to-frame alignment and extractor tension.
Q&A: Do I need a Federal Firearms License (FFL) to build my own firearm? No, as long as the completed firearm is for personal use and not for sale; some states require serialization. Can any receiver be completed at home? Yes, most 80% receivers lack critical machining steps and require finishing for operation.
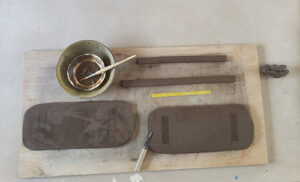
Overview of Components Found in a Partial Lower Set
The build-your-own firearm experience has transformed how enthusiasts acquire and customize their weapons. By legally assembling a firearm from individual components, users bypass traditional serialized receiver purchases, often resulting in a completely unserialized firearm. This process typically involves selecting a lower receiver or 80% receiver, a barrel, trigger group, and stock. **The build-your-own firearm experience** offers unparalleled flexibility for personalization and technical learning, though it requires careful attention to legal compliance. Key steps include:
- Choosing a compatible receiver and jig for precision drilling.
- Installing the lower parts kit with proper torque specifications.
- Attaching the upper receiver assembly and ensuring headspace safety.
Selecting the Right Partial Lower for Your First Build
Selecting the right partial lower receiver is a critical first step for your initial build. The majority of builders opt for a standard mil-spec forged receiver due to its proven durability and universal compatibility with most upper receivers and parts kits. Choosing a reputable manufacturer is essential to ensure proper material hardness and precise tolerances. Avoid overspending on billet receivers for a first project, as their complex features offer marginal benefit for a novice. Instead, focus on a stripped lower, which allows you to learn the assembly process. Many first-time builders overlook the importance of checking that the trigger pocket dimensions match their intended fire control group. Ultimately, your choice should center on a component that is both budget-friendly and compliant with local laws, ensuring a solid foundation for future customization. Prioritizing a straightforward lower simplifies your entire first build experience.

Comparing Materials: 7075 vs. 6061 Aluminum Options
Picking the right partial lower for your first build is all about balancing budget, features, and future plans. Choosing a quality lower receiver sets the foundation for a reliable rifle without breaking the bank. Start by deciding between billet and forged—billet offers unique aesthetics and sometimes integrated trigger guards, while forged is classic and proven. Check compatibility with your chosen upper and buffer system, as tolerances vary between brands like Aero Precision (a solid first pick) and Anderson. Look for a lower with an oversize bolt catch and a flared magazine well for easier reloads. Skip the stripped bargain bin lowers if you value smooth assembly and crisp locking.
- Material: 7075 aluminum is tougher; 6061 is lighter and cheaper.
- Finish: Mil-spec hardcoat anodizing beats cerakote for durability on a budget build.
Anodized Finishes vs. Raw Billet Blanks
Picking your first partial lower is the most crucial step—it’s the foundation of your whole build. You want something rock-solid and compatible with your chosen upper. Stick with a reputable brand like Aero Precision or Anderson for reliable fit and function. Choosing a mil-spec lower for your first build guarantees part compatibility. Skip the fancy ambi controls for now; they add cost and complexity. Focus on a stripped lower so you can learn assembly from scratch. You’ll need a lower parts kit and a buffer tube setup that matches your stock.
A bad lower makes every other part fight you—start solid or start over.
Here’s what to check before buying:
- Material: 7075-T6 aluminum is tougher than 6061.
- Finish: Anodized black wears best for a first build.
- Pocket style: Choose deep-engraved “A” markings for easy selector installation.
Matching Your Blank to a Compatible Upper Receiver

Choosing the right partial lower receiver is the first big decision for your AR-15 build. You want a forged 7075-T6 aluminum lower for the best blend of strength and weight, as billet options are often heavier and pricier. Stick with mil-spec dimensions to ensure your upper receiver and parts kit fit without hassle. Consider your budget and what’s included: some lowers come with a grip and stock, others are completely stripped. Also, think about the finish—anodized is durable, while cerakote offers more color options. Just avoid unknown brands or cheap cast metal; a solid foundation now saves headaches later.
- Material: 7075-T6 aluminum is ideal; avoid polymer or unknown metals.
- Spec: Mil-spec for guaranteed compatibility.
- Extras: Stripped vs. complete with furniture.
- Finish: Anodized for durability, cerakote for style.
- Brand: Stick with reputable names like Aero Precision, Anderson, or Palmetto State Armory.
Essential Tooling to Complete an Incomplete Receiver
To complete an incomplete receiver—typically a firearm component like an 80% lower—essential tooling includes a drill press, a vise, and specialized jigs to ensure precise alignment. End mills and cobalt drill bits are critical for machining fire control cavities, while calipers and gauge blocks verify dimensional tolerances. Safety equipment, such as eye protection and deburring tools, is non-negotiable. A finishing operation often requires a router or milling machine for complex cuts.
Failure to use hardened tooling can result in catastrophic part failure or unsafe firearm function.
Additionally, files and polishing stones smooth rough edges, and anodizing kits may be used for final corrosion resistance. The process demands strict adherence to legal regulations, as the completed receiver must not violate serialization or classification laws. Without proper setup and measurement tools, even skilled amateurs risk irreparable damage to the workpiece.
Jigs and Fixtures That Simplify Pocket Milling
To complete an incomplete AR-15 receiver, your essential tooling must prioritize precision and safety. A receiver action block and vise are non-negotiable for securing the lower without deformation. You’ll need quality drill bits for the trigger and hammer pin holes, along with a set of pin punches to drive roll pins without marring the finish. A torque wrench and castle nut tool are mandatory for securing the buffer tube assembly to spec. Lastly, always use safety glasses for debris control, and a center punch for accurate hole alignment.

Drill Press vs. Hand Router: Which Approach Works Best
Completing an incomplete receiver demands precise tooling beyond basic gunsmithing. A receiver jig is non-negotiable for maintaining alignment during drilling and milling, while a drill press with a cross-vise ensures perpendicular pilot holes for trigger and barrel pins. You must also have hardened steel reamers and end mills to finish critical pockets, avoiding chatter and galling. A set of pin punches and a brass hammer prevent damage during component seating. Essential tooling for firearm assembly eliminates guesswork and ensures structural integrity.
Without a proper jig, even minor misalignment can render a receiver unsafe or non-functional.
For surface prep, include 220-grit sandpaper and a deburring tool to smooth sharp edges. Always verify headspace with Go/No-Go gauges after barrel installation; failing this test demands immediate adjustment. Invest in quality tools—cutting corners risks permanent failure.
Safety Equipment and Workbench Setup for Beginners
Building an incomplete receiver from a kit or partial build is totally doable with the right gear. Your most critical investment is a quality multimeter for testing receiver circuits. You’ll need it to check for shorts, measure voltages, and verify your solder joints. Beyond that, a temperature-controlled soldering iron with fine tips is non-negotiable. Don’t forget a desoldering pump for fixing mistakes. A signal generator and an oscilloscope help you align the RF stages, but for basic completion, a simple dummy load and a Polymer80 frequency counter will get you on the air. Keep a good set of wire cutters and small screwdrivers handy.
Step-by-Step Process to Finish a Blank Lower
Begin by thoroughly cleaning the receiver to remove any packing oils and debris, which is critical for safe and accurate machining. Secure the lower in a dedicated jig, then use a quality end mill or drill to create a pilot hole for the trigger pocket and selector. Follow jig guides to remove material in incremental passes, taking light cuts to prevent tool breakage. After machining the fire control group pocket and safety selector detent channel, chamfer all sharp edges to prevent stress risers. Debur the interior thoroughly, paying special attention to the trigger slot where sear engagement occurs. Finally, install the trigger guard using roll pin punches, and test fit all lower parts. Never rush; verify each dimension against a mil-spec print before proceeding to ensure reliability and firearm safety.
Aligning the Jig and Securing the Unfinished Chassis
Begin by securing the 80% lower receiver in a dedicated jig, ensuring alignment with your drill press or milling machine. Using a quality AR-15 lower receiver jig is non-negotiable for precision. First, center drill all pilot holes for the trigger pocket and selector detent, then gradually increase bit sizes to the final diameter. Next, mill the fire control pocket to the specified depth using a 3/8-inch end mill, taking shallow passes to avoid chatter. After deburring the pocket, drill the trigger pin and hammer pin holes with a #28 drill bit, then tap them if required. Finally, drill the rear takedown pin detent hole and safety selector hole, ensuring perpendicular alignment to the receiver walls.
- Tools: Jig, drill press, end mills, calipers, taper pin reamers.
- Key Steps: Secure jig → center-punch → drill pocket → mill depth → drill pin holes → clean & check.
Q: Can I use a hand drill instead of a drill press?
A: No. A drill press ensures perpendicular holes, preventing misalignment that could cause jams or safety issues. A hand drill introduces wobble, risking an out-of-spec receiver.
Milling the Trigger Pocket and Fire Control Cavity
First, double-check your workspace is clean and free of static, as finishing a stripped lower receiver at home requires focus. Start by gripping the lower in a vise with a dedicated jig; this holds everything steady. Use a drill press or hand drill to carefully enlarge the fire control pocket—follow your jig’s guide holes precisely, going slow to avoid wandering. Next, mill or file the trigger slot and safety selector indent, checking fit often. A sharp bit makes all the difference here, preventing chattering. After that, tap the holes for the grip screw and bolt catch, using cutting oil. Finally, deburr all edges with a small file, clean off any shavings, and test-fit your parts before assembly.
Drilling Pin Holes for Selector and Hammer Components
To finish a blank lower receiver, start by securing the raw forging in a sturdy vise with soft jaws to prevent marring. Next, use a drill press and a dedicated jig to precisely locate and drill the trigger pin, hammer pin, and safety selector holes. Then, carefully mill out the trigger pocket using the jig’s router bit and template, removing material in shallow passes to avoid binding. After machining, deburr all edges with a fine file, then install the lower parts kit (LPK). Finally, function-check the safety selector and trigger reset, ensuring smooth operation before assembly. Finishing an 80% lower requires strict adherence to jig instructions to maintain legal compliance.
Common pitfalls include off-center drilling or pocket chatter from fast feed rates.
Q: Do I need a serial number?
A: For personal use, no—but verify local laws; selling a unserialized lower is often illegal.
Troubleshooting Common Issues During the Build
Troubleshooting common issues during the build transforms frustration into a valuable learning experience. A frequent culprit is loose power connections, often causing intermittent failures that mimic component death. Carefully reseating every cable often resolves the problem instantly. Common assembly errors, like forgetting the I/O shield or overtightening the cooler, can block ports or warp the motherboard. If the system fails to POST, consult the motherboard’s debug LED; its sequence pinpoints the failing hardware. For graphics cards, ensure the monitor is plugged into the GPU, not the motherboard. Effective cable management prevents airflow obstructions and accidental fan catching. Patience and methodical rechecking of each step are your most powerful diagnostic tools, turning a stalled build into a triumphant boot.
Correcting Off-Center Milling Without Ruining the Project
When you hit a snag during your build, don’t panic. A loose cable or a forgotten power connection is often the culprit—double-check every header and plug before blaming the hardware. Common PC build troubleshooting usually starts with a no-POST scenario, where the fans spin but the screen stays black. First, reseat your RAM sticks and GPU, as these are frequent offenders. If you get an error code, consult your motherboard manual’s LED debug guide. For a stubborn boot loop, try clearing the CMOS battery or booting with a single RAM stick. Remember, taking it slow and verifying each component step-by-step saves you from hours of frustration.
Q: My PC powers on but shows no display. What next?
A: Reseat the GPU and its power cables, ensure the monitor is plugged into the GPU (not the motherboard), and test one RAM stick at a time.
Dealing with Burrs and Sharp Edges After Machining
Building a PC often feels like a high-stakes puzzle, where a single loose cable can halt the entire adventure. Common build issues usually stem from power delivery or component seating. If the system fails to post after assembly, first check the power supply switch and motherboard 24-pin connector. A forgotten front-panel header is a frequent culprit—reseat it carefully. Once, a friend spent an hour troubleshooting a black screen, only to find the display cable plugged into the motherboard instead of the GPU. Noisy fans or unexpected shutdowns suggest inadequate cooling or a misaligned CPU cooler. For persistent boot loops, reseat the RAM sticks; a single improperly clicked module can stop everything cold. Patience and systematic checks turn this stressful moment into a triumphant first boot.
Ensuring Proper Fitment for Lower Parts Kits
When building a system, post-build troubleshooting often targets three common culprits. First, if the system fails to power on, re-seat all power connectors and verify the PSU switch is on. No display output typically requires re-seating the RAM or checking the GPU power cables. For boot failures, ensure storage drives are detected in BIOS and boot order is correct. Systematic testing—removing non-essential components—quickly isolates faulty parts.
Exploring Alternative Applications for Unfinished Receivers
Unfinished receivers, typically components rejected during manufacturing due to cosmetic flaws or incomplete circuitry, offer surprising utility beyond their intended use. Technicians and hobbyists frequently repurpose these units for educational training kits, where students can safely practice soldering and diagnostics without damaging expensive equipment. Their incomplete state also makes them ideal for prototyping custom audio filters or signal amplifiers, as the open architecture allows for easy modification. Additionally, collectors sometimes use them as donor platforms for salvageable parts like capacitors or jacks, reducing electronic waste. In niche engineering fields, these receivers serve as test beds for experimental power management systems, leveraging their existing but flawed wiring to validate new concepts. This secondary lifecycle not only diverts materials from landfills but also provides a cost-effective resource for innovation in audio and radio technology.
Using a Self-Milled Frame for Custom Caliber Conversions
Exploring alternative applications for unfinished receivers, particularly in radio frequency and audio engineering, reveals a pathway for cost-effective experimentation. These partially constructed devices, often lacking final tuning or housing, can be repurposed as dedicated signal probes for spectrum analysis or as educational tools for teaching circuit theory. A key advantage lies in their modular nature, which allows for easy modification of components like capacitors and inductors without concern for damaging a finished product. This approach is especially valuable for hobbyists and students working with software-defined radio platforms. Repurposing unfinished hardware accelerates the iterative design process for low-frequency prototypes.
Pistol and Rifle Configurations from the Same Starting Blank
In the dusty corner of a small-town workshop, a partly assembled radio receiver—its casing cracked, its tuning dial missing—found new life not as a broadcast device, but as a low-frequency seismic monitor. This unfinished receiver, once destined for AM stations, now listens to the earth’s subtle tremors, its exposed circuits repurposed to detect ground vibrations. Upcycling unfinished electronics unlocks such hidden potential. Across these benches, other incomplete receivers become educational tools for teaching circuit logic, or simple weather stations recording atmospheric noise. Their former incompleteness is not a flaw but an invitation—a blueprint for invention where each missing piece sparks a custom solution.
Integrating Ambidextrous Controls During the Build Phase
Unfinished receivers, often seen as engineering dead ends, are finding vibrant second lives as modular development platforms for bespoke projects. Their raw circuitry provides an ideal sandbox for experimenting with advanced signal processing algorithms or integrating niche frequency bands without the constraints of finalized firmware. Hackers and audio purists alike are transforming these bare bones into high-fidelity, purpose-built units. A common practice involves repurposing the chassis and power supply to host experimental SDR (Software-Defined Radio) blocks, while others strip them for low-noise amplifier components. This upcycling consumer electronics approach dramatically reduces e-waste and lowers the barrier to entry for hobbyist innovation.
Online Resources and Community Support for Builders
For modern builders, a vast ecosystem of online resources and community support is the ultimate competitive advantage. Platforms like GitHub, Stack Overflow, and dedicated Discord servers provide instant access to proven code libraries, troubleshooting expertise, and real-time collaboration. These networks eliminate guesswork, accelerating project timelines from conception to deployment. Engaging with specialized subreddits or niche forums unlocks insider knowledge on the latest frameworks and optimization techniques. By actively participating in these communities, you gain an unparalleled safety net against technical roadblocks. The evidence is clear: leveraging these digital toolkits and expert peer groups is no longer optional but a critical strategy for staying efficient and innovative. Mastering these resources directly translates to faster, more reliable builds and a thinner margin for error. Seize this collective intelligence to elevate your craft immediately.
Top Forum Threads for Step-by-Step Guidance
For builders at any skill level, leveraging online resources and community support is essential for efficient problem-solving and skill advancement. A vast ecosystem of platforms offers immediate technical guidance, from comprehensive documentation on official developer portals to in-depth tutorials on sites like freeCodeCamp and YouTube channels like Web Dev Simplified. Leaning on active community forums accelerates your troubleshooting process. Platforms such as Stack Overflow, GitHub Discussions, and dedicated subreddits provide direct access to experienced peers who can dissect complex errors or review your code architecture.
Do not attempt to build in a silo; tapping into the collective intelligence of developer communities cuts your debugging time in half and exposes you to best practices you would not discover alone.
Beyond bug fixes, these communities foster networking and career growth. You can find specialized channels for specific frameworks (e.g., Reactiflux on Discord), project collaboration, and even mentorship pairings. To get the most out of them, follow these practices:
- Search first – Most common issues are already solved; search the forum before posting.
- Provide minimal reproducible examples – Share a clear snippet of code and the exact error to get precise help.
- Contribute back – Answer questions in your area of expertise to build reputation and deepen your own understanding.
Video Tutorials That Cover Jig Use in Detail
Online resources and community support for builders have never been more accessible. Whether you’re into woodworking, coding, or 3D printing, platforms like GitHub, Instructables, and Reddit’s r/DIY offer free tutorials, templates, and troubleshooting advice. Community-driven project hubs let you share progress and get real-time feedback. For example, on Discord servers or Maker Forums, you can ask specific questions and see how others solved similar issues. Video walkthroughs on YouTube also cut down learning time—just search your problem. The key is to engage: don’t just lurk, comment and tag your builds.
Quick Q&A
Q: Which platform is best for beginners?
A: Start with YouTube for visual guides, then join a subreddit like r/BeginnerWoodWorking for peer support.
Aftermarket Parts Suppliers That Support DIY Enthusiasts
The ecosystem for builders now thrives on a rich mix of digital documentation and community-driven platforms. GitHub, Stack Overflow, and specialized forums like Dev.to provide essential code repositories and troubleshooting advice. Leveraging open-source communities accelerates project development through shared knowledge. Builders often rely on official API docs from providers like AWS or Vercel, while Reddit communities and Discord servers offer real-time peer support. Video tutorials on YouTube and interactive courses on freeCodeCamp further bridge skill gaps. For hardware projects, platforms like Hackaday.io showcase builds and foster collaboration. The rise of AI-assisted coding tools has also reshaped how beginners access support, though peer review remains vital for quality assurance.